Panasonic Lumix DMC-GF2 Operation and controls


Top of camera controls

Here we see the GF2's de-cluttered top plate. It plays host to the power switch, shutter button, movie record button (now larger and more prominent), and the G2-style iA button. Pressing this switches the camera into its user-friendly Intelligent Auto mode, with the button lighting up blue in the process.
The familiar thumbwheel that's used to change basic exposure settings is on the back of the camera below the iA button, and in typical Panasonic fashion can be clicked in to change the parameter it's controlling (shutter speed, aperture, or exposure compensation in PASM modes, or Peripheral Defocus in iA mode). It's shrunk in size and is now a little small, but still quite useable. The little grille on the back beside the hot shoe conceals the speaker that's used during playback (moved from the front of the hot shoe on the GF1).

Rear of camera controls

The back of the camera is very simple, with a four-way controller surrounding the Menu/Set button that provides direct access to the most commonly-changed functions. Above this is the button to enter playback mode, and below is one which can be configured either as a direct access 'Fn' button, or to bring up the new fully-customizable Quick Menu that lets you access a wide range of other functions of your choice. In playback mode, this also acts as the delete key.
None of the functions that had their own buttons on the GF1 have disappeared completely; they're all either options on the 'Fn' key or in the Quick Menu. However you can of course only assign one function to Fn at any one time, so can set the camera up to access either AF/AE lock or DOF preview, but not both. Also if you choose to use this key as 'Fn', you no longer get button-driven access to the Quick Menu, meaning you have to access it via the touchscreen control.
It's important to appreciate, however, that pretty well all the controls you're likely to change the most - shutter speed, aperture, exposure compensation, ISO and white balance - still behave in exactly the same way as on the rest of the G-series. You certainly don't have to use the touch screen all of the time.

Shooting displays (live view) and touchscreen control

The GF2, like the G2 and GH2 before it, gains a touch screen, but the big difference is that with the loss of many of the buttons and dials, it now becomes a much more integral part of the camera's controls. It's the most convenient and streamlined way to change exposure mode and access the Quick Menu, and the interface has been redesigned to reflect this with large, easy to press buttons appearing on the screen whenever you go into touch selection mode. Once the menu is displayed, you can also navigate the options and and change your settings using the 4-way controller.
This is the GF2's standard shooting mode display screen. Translucent blue rectangles act as virtual buttons which you can press to change exposure mode, access the quick menu, operate the touchscreen shutter or change the display mode.
For a less cluttered view you can turn the shooting data display off.
Pressing the Exposure Mode button at the top left brings up this selection window - simply tap the mode you want to use next.
The redesigned Quick Menu is crucial to making this new interface work well for more advanced users. The name may have stayed the same, but the GF2's version' is radically different - and improved - from that on any previous G series camera. Instead of having to cycle through all the options Panasonic has chosen to show on the screen regardless of whether you're likely to change them or not, you now get a shortlist of frequently-changed settings to choose from. By default this displays aspect ratio, size and quality options for both stills and movies, plus metering pattern and focus mode, but you can build your own personalized function menu containing as many or few as you like from a choice of no fewer than 23 functions.
Press the Q Menu button and you get a screen like this. The currently available functions are displayed in a row towards the bottom, and a box above displays the options you can select from.
Pressing the 'Spanner' button at the lower left of the screen allows you to customize the Q Menu to suit your personal needs. First you get this 'explanatory' screen...
...then you can drag and drop items from the top window (from a choice of 23) onto the Q menu bar below. These can be set in any order you like.
The touchscreen control can also be used to select autofocus point, as on the G2 and GH2, and to operate the 'Peripheral Defocus' control. This is no longer a slightly pointless uncontrollable scene mode, but is instead integrated into iAuto in a fashion decidedly reminiscent of the Sony NEXs' 'Bkgrnd Defocus'. Panasonic has sensibly limited the minimum aperture available in this mode to F11, which should reduce the risk of getting soft images due to diffraction / camera shake / high ISO noise.
You can touch the screen to tell the camera whereabouts in the scene you want it to focus.
In iAuto, tapping the second button from the top on the right activates the 'Peripheral Defocus' mode. A simple slider acts as a results-orientated aperture control, with the effect previewed live on the LCD.

You can also combine exposure compensation with Peripheral Defocus, although mystifyingly the effect on image brightness isn't previewed.

Menus

The GF2's menus have been given a cosmetic makeover, and reordered and rearranged in a more logical fashion. On first pressing 'Menu' you reach a new opening screen (again with a strangely familiar look to it) that gives button-driven access to the mode selection window. The not-much-loved 'My Menu' of most-recently used items has been discarded, presumably because it wouldn't fit on that initial screen.
The first press of the menu button brings you to this opening screen. Five buttons correspond to Panasonic's standard menu tabs (with My Menu removed), the other brings up the Exposure Mode selection screen.
The menus proper will look familiar to existing Panasonic owners, just a bit more colourful. Compared to the GF1 they're re-ordered and rationalized, but much the same array of options is available.

New features /controls

The GF2 offers a number of new controls compared to the GF1, mostly related to the touchscreen and the camera's enhanced movie capabilities.
Borrowed from the GH2, you can adjust the sensitivity level of the microphone in four steps, with a sound level meter to help you judge the best setting. There's also a Flicker Reduction setting for shooting under fluorescent light, that allows you to tell the camera the expected flicker frequency.
The 'Picture Adjust' control is a slightly simplified version of what Panasonic previously called 'Film Mode', allowing control over contrast, saturation etc. In the custom menu you can choose which of the touchscreen control options you want to enable or turn off.

Some final thoughts


The GF2 is certainly a camera that will cause some dismay amongst diehard G-series fans. Because it's the successor to such a highly-regarded camera, and is so different in design and operational concept, it's bound to split opinions. We're sure many will bemoan the loss of the buttons and dials and look aghast on the way they've been replaced by - the horror! - a touchscreen. Others, though, will look at the more compact body and enhanced video mode and add the GF2 to their wishlists.
To be honest, I'm the kind of user who naturally gravitates towards the former camp. As a GF1 owner myself, I appreciate the immediacy of control offered by all those dials and switches. But after playing with the GF2 for a few days I think it's important not to dimiss it out of hand. The reason external controls are desirable is because they're fast and intuitive, and the way Panasonic has implemented the touchscreen means that their on-screen replacements work almost as seamlessly. If well-implemented touch interfaces can transform the humble telephone, why can't they work on cameras?
In truth there's not a lot about the GF2 to tempt GF1 owners to upgrade, but it's still a hugely capable camera that, as long as you can accept the touchscreen, looks like it should work pretty well. We suspect that when it starts getting into the hands of users a lot of the inevitable initial scepticism will disappear; on the other hand we do still hope the Panasonic finds a way to produce a more GF1-like design in future too.

Panasonic Lumix DMC-GF2 Specification,Preview And Price


specifications


Price • US: TBA
• UK: £599.99 (14-42mm zoom lens)
• UK: £629.99 (with 14mm lens)
• UK: £729.99 (14-42mm + 14mm zoom lens)
• LVF1 viewfinder: $229.95 (US) / £186 (UK)
Body material Metal
Sensor • 4/3 type MOS ('Live MOS sensor')
• 13.06 million total pixels
• 12.10 million effective pixels
• RGB (Primary) color filter array
Image sizes* • 4000 x 3000 (4:3)
• 2816 x 2112 (4:3)
• 2048 x 1536 (4:3)
• 1600 x 1200 (4:3 when 3D lens is attached)*
• 4000 x 2672 (3:2)
• 2816 x 1880 (3:2
• 2048 x 1360 (3:2)
• 1600 x 1064 (3:2 when 3D lens is attached)*
• 4000 x 2248 (16:9)
• 2816 x 1584 (16:9)
• 1920 x 1080 (16:9)
• 1600 x 904 (16:9 when 3D lens is attached)*
• 2992 x 2992 (1:1)
• 2112 x 2112 (1:1)
• 1504 x 1504 (1:1)
• 1440 x 1440 (1:1 when 3D lens is attached)*
Aspect ratios 4:3
3:2
16:9
• 1:1
File formats* • RAW
• RAW + JPEG Standard
• RAW + JPEG Fine
• JPEG (EXIF 2.2) - Standard
• JPEG (EXIF 2.2) - Fine
• MPO+Fine (with 3D lens)*
• MPO+Standard (with 3D lens)*
Movie mode  AVCHD*
• NTSC:
Full HD: 1920 x 1080, 60i (sensor output is 30p), 17Mbps or 13Mbps
HD: 1280 x 720, 60p (sensor output is 30p) 17Mbps or 13Mbps

• PAL:
Full HD: 1920 x 1080, 50i (sensor output is 25p) 17Mbps or13Mbps
HD: 1280 x 720, 50p (sensor output is 25p) 17Mbps or 13Mbps

 Motion JPEG
• HD: 1280 x 720, 30fps
• 16:9: WVGA : 848 x 480, 30fps
• 4:3: QVGA : 320 x 240, 30fps / VGA : 640 x 480, 30fps
Lenses • Micro Four Thirds mount lenses
• Four Thirds mount lenses via adapter (DMW-MA1PP)
Focus modes • Contrast AF system
• Manual focus
• Face Detection
• AF Tracking
• 23-Area-Focusing/1 Area Focusing
• Single or Continuous AF
• Touch AF (1- area-focusing in Face detection / AF Tracking / Multi-area-focusing / 1-area-focusing)
AF assist lamp Yes, dedicated lamp
Image stabilization None (lens only)
Digital zoom • Up to 4x
Exposure modes • Program AE
• Aperture priority AE
• Shutter priority AE
• Manual
• iAuto
• SCN
• Movie
• Custom (3 memories)
Scene modes • Portrait
• Soft Skin
• Architecture
• Sports
• Peripheral Defocus
• Flower
• Food
• Objects
• Night Portrait
• Night Scenery
• Illuminations
• Baby 1,2
• Pet
• Party
• Sunset
Sensitivity* • Auto
• Intelligent ISO
• ISO 100
• ISO 200
• ISO 400
• ISO 800
• ISO 1600
• ISO 3200
• ISO 6400*
Metering 144-zone multi-pattern sensing system
Metering range 0 to 18 EV
Metering modes • Multiple-Weighted
• Center-Weighted
• Spot
AE Lock • Set the Fn button in custom menu to AE lock*
AE Bracketing* • 3 or 5 frames
• 1/3 or 2/3 steps to ±2.0 EV
Exposure steps 1/3 or 1.0 EV
Exposure compensation • -3.0 to +3.0 EV
• 1/3 EV steps
Shutter speed • 60 -1/4000 sec
• Bulb (up to 4 mins)
• Flash X-sync 1/160 sec
White balance • Auto
• Daylight
• Cloudy
• Shade
• Halogen
• Flash
• Custom 1
• Custom 2
• Kelvin temp (2500 - 10000 K, 100K steps)
WB fine tuning Yes (blue/amber bias, magenta/green bias)
WB Bracketing • 3 shots
•+/-1 to +/-3 in either blue/amber or magenta/green axis
Color space • sRGB
• Adobe RGB
Image parameters* • My Color mode (Expressive/Retro/Pure/Elegant/Monochrome/Dynamic Art/Silhouette/Custom)
• Saturation
• Contrast
• Sharpness
Drive modes * • Single
• Continuous H (3.2 fps)
• Continuous M (2.6 fps)
• Continuous L (2 fps)
Continuous buffer • 7 RAW images
• Unlimited JPEG images with a fast card
Self-timer • 2 sec
• 10 sec
• 10 sec, 3 images
Flash • Manual pop-up
• TTL auto / manual
• Guide no. 6.0 (ISO 100, m)
• Sync modes: Auto, On, Off, Red-eye reduction, Slow syncro with red-eye reduction, Slow syncro
Flash X-sync speed 1/160 sec
External flash • Hot shoe
• TTL Auto with FL220/FL360/FL500 (Optional)
Viewfinder • Optional Electronic Viewfinder
Orientation sensor Yes, via OIS lenses only
LCD monitor • 3.0" Low temperature Polycrystalline TFT LCD
• 3:2 aspect ratio
• Wide viewing angle
• 460,000 dots
• 60 fps
• Approx 100% frame coverage
• Brightness (7 levels), Color (7 levels)
Playback functions Normal playback, 30-thumbnail display, 12-thumbnail display, Calendar display, Zoomed playback (16x Max.), Slideshow (duration & effect is selectable), Playback Mode (Normal/Picture/AVCHD/Motion JPEG/3D Play/Category/Favorite), Title Edit, Text Stamp, Video Divide, Resize, Cropping, Aspect Conversion, Rotate, Rotate Display, Favorite, Protect, Face Recognition Edit
Microphone* • Stereo (with Wind Cut: Off/Low/Standard/High)
• Microphone level adjustable: Lv1/Lv2/Lv3/Lv4
Connectivity • USB 2.0 (High Speed)
• Video Out (NTSC / PAL)
• HDMI
Print compliance • PictBridge
• DPOF
Storage SD / SDHC / SDXC
Power* • ID-Security Li-ion Battery Pack (7.2V, 1010mAh)
• Supplied charger / AC adapter
Dimensions* 113 x 68 x 33 mm / 4.44 x 2.67 x 1.29 in
Weight (camera body)* Approx. 265 g (9.35 oz)
Weight (inc H-FS014042 lens, card and battery)*

Preview

Approx. 475 g (16.75oz)
 
The DMC-GF2 is essentially a smaller, externally-simpler version of the GF1 that's acquired many of the feature upgrades we first saw on the G2 (most notably the touch-sensitive screen) plus Full HD video. Its body is smaller in every dimension than its predecessor's, making it very nearly as petite as the Sony NEX-5. In the process, though, it's shed a significant number of those external controls that until now have been the hallmark of the G series - most obviously the exposure mode dial, but also the drive-mode lever that sat beneath it, along with several of the buttons on the back. This places rather greater reliance on the touchscreen for quick operation compared to the G2, and Panasonic has redesigned the interface (and the Quick Menu in particular) to facilitate this.
These changes all signal a clear repositioning of the GF series in the market. Whereas the GF1 was unashamedly a camera for enthusiast photographers, the GF2 is now aimed much more at compact camera owners looking for an upgrade. According to Panasonic the design emphasis has been on offering creative controls as opposed to just providing a simple, unintimidating camera which happens to contain a larger sensor.
Despite this, there's still a smattering of clear updates and improvements over the previous model, and while they're generally more evolutionary than revolutionary, this mainly reflects the maturity of the GF1 design. Most notably, the GF2 gains Full HD movie recording capability (1080i at 60fps from 30p capture) that is supported by a stereo microphone on the top plate. In spec terms, at least, this makes for the most capable interchangeable lens camera movie capability aside from the GH2 (which offers 1080i at 60fps from 60p capture). On the photographic side it inherits the G2's ability to shoot at 2.6 fps while maintaining live view, along with its ISO 6400 maximum sensitivity, improved Auto ISO program and a dedicated iAuto button on the top plate. Meanwhile 3D fans will undoubtedly be delighted by its support for the new H-FT012 lens.
Much of the key spec, though, remains unchanged, including the stalwart (i.e. ageing) 12Mp Four Thirds sensor and the 460k dot 3" 3:2 aspect ratio LCD. The hot shoe and associated EVF port is still present and correct, alongside the little pop-up flash, and thankfully Panasonic hasn't been tempted to discard the clickable thumbwheel that operates the primary exposure controls. However the pared-down body design inevitably means the camera is powered by a new, slightly smaller battery.
One slightly unexpected marketing change is that the GF2 will not be bundled with the 20mm F1.7 pancake lens, but instead come with a choice of either the latest 14-42mm zoom, the diminutive 14mm F2.5 pancake, or in a twin lens kit with both. We're a bit mystified by this decision, to be honest - yes the 14mm gives the smallest possible package, but as far as we're concerned the stop-faster 20mm is a much more useful all-rounder. The GF2 will be available in a choice of colors depending on market (out of black, red, silver, white and pink), and for buyers of the red and black versions the 14mm lens will come with a black (as opposed to steel grey) barrel.

Compared to the competition

The trimming-down exercise Panasonic has applied to the GF2 means that it's now one of the smallest cameras in its class. Here it is with the 14mm F2.5 lens sitting between two of its direct competitors each kitted out with their respective wideangle pancakes, the Sony NEX-5 + 16mm F2.8 and Samsung NX100 + 20mm F2.8 (the latter is much the same size as the GF1 and the Olympus E-PL1).
The GF2 is now one of the smallest cameras of its type, although it's still not as tiny as the NEX-5 despite having a smaller sensor than the Sony's APS-C chip. The key difference is in the body height, though, which reflects the GF2's hot shoe and built-in flash: features which are missing on the NEX.
Viewed from the top, the GF2 / 14mm F2.5 combo becomes, by a whisker, the slimmest of the three.

Compared to DMC-GF1

The GF2 is, unusually for Panasonic's recent releases, substantially different in design from its predecessor. Here it is sporting the 14mm F2.5 pancake alongside the GF1 wearing the 20mm F1.7. The sleeker, simplified design is immediately apparent.
From the front, what's most obvious is the reduced size of the GF2 - indeed it's not so much bigger than the LX5 (click here for a comparison). The loss of the mode dial (replaced by a stereo microphone on the top plate),the remolded grip and the closer integration of the hot shoe into the overall design all adds up to a cleaner, less boxy look.
Top-down, we can see that the GF2 is also somewhat slimmer the the GF1; Panasonic has succeeded in trimming about 4mm from the body depth.
It's at the rear, though, that the biggest changes lie. The wealth of buttons that adorned the GF1's back has been simplified right down, and the restyled four-way controller gives a more 'compact-like' appearance. The blue tinge to the GF2's LCD screen signifies a small, but potentially welcome change - the addition of an anti-reflective coating that should aid shooting in bright sunlight.

GF2 vs GF1 - major changes

Here's a brief summary of the major changes between the GF2 and GF1:
  • Smaller and lighter body
  • LCD screen now touch-sensitive, with added anti-reflective coating
  • Fewer external controls (mode dial, drive mode lever, AEL and DOF preview buttons removed)
  • Completely revamped, fully-customizable Quick Menu designed for touchscreen operation
  • Built-in stereo microphone
  • 1080i 60fps full HD video (from 25p sensor output)
  • Continuous shooting at 2.6fps with Live View
  • Increased maximum sensitivity (ISO 6400)
  • iAuto button on top plate
  • Variable 'Peripheral Defocus' control in iAuto mode, with live preview
  • Full support for F-FT012 3D lens
  • No remote release socket
  • 2nd curtain sync and flash exposure compensation no longer available
  • New smaller DMW-BLD10 battery with slightly lower capacity (7.3Wh vs 9 Wh)

Specifications compared


Panasonic GF2

Panasonic GF1
Sensor • 4/3 type MOS ('Live MOS sensor')
• 13.06 million total pixels
• 12.1 million effective pixels
• RGB (Primary) color filter array
• 4/3 type MOS ('Live MOS sensor')
• 13.06 million total pixels
• 12.1 million effective pixels
• RGB (Primary) color filter array
Sensitivity ISO 100-6400 in 1/3EV steps ISO 100-3200 in 1/3 EV steps
Movie mode • AVCHD :
1920 x 1080i 60fps (Approx 17 or 13 Mbps)
1280 x 720p 60fps (Approx 17 or 13 Mbps)

• Motion JPEG:
1280 x 720, 30fps
848 x 480, 30fps
640 x 480, 30fps
320 x 240, 30fps

• Stereo sound (with adjustable rec volume)
• AVCHD Lite:
1280 x 720p 60 fps
(Approx 17 or 9 Mbps)


• Motion JPEG:
1280 x 720, 30fps
848 x 480, 30fps
640 x 480, 30fps
320 x 240, 30fps

• Mono sound
LCD monitor • 3.0" TFT LCD monitor
• Touch sensitive
• 460,000 dots
• Approx 100% frame coverage
• 3.0" TFT LCD monitor
• 460,000 dots
• Approx 100% frame coverage
Microphone • Built-in stereo • Built-in mono
Remote release • none • Wired remote control DMW-RSL1 (optional)
Dimensions 113 x 68 x 33 mm
(4.4 x 2.7 x 1.3 in)
119 x 71 x 36 mm
(4.7 x 2.8 x 1.4 in)
Weight
(body only, no card/battery)
265 g (9.4 oz.) 285 g (10 oz.)

Great Tips to improve your Photography

It’s a new week and I’ve got a new set of tips to improve your photography. This week’s tips focus on planning and decision making while taking your shots…. Eventually it will feel like second nature and you won’t even be aware of the process, until then… keep these tips in mind.

1. Daydream


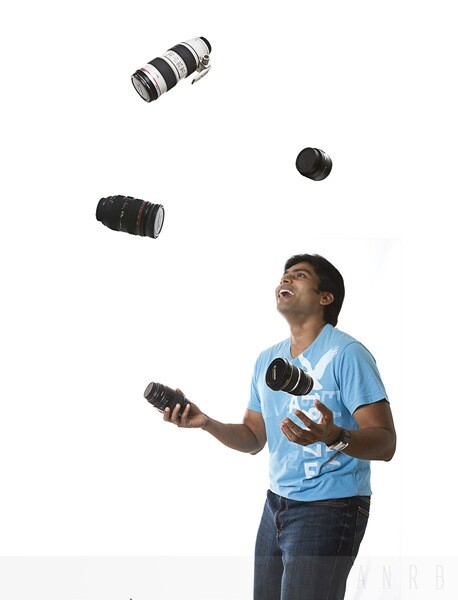
Yes, that’s right keep dreaming about your shot. Pre-Visualize in your mind what it will look like and walk through the steps you need to take to get it. This is a shot I thought about for several weeks before finally setting it up and taking it. With only one camera, I often feel like I’m constantly juggling lenses!
improve-photography-tips-111.jpg

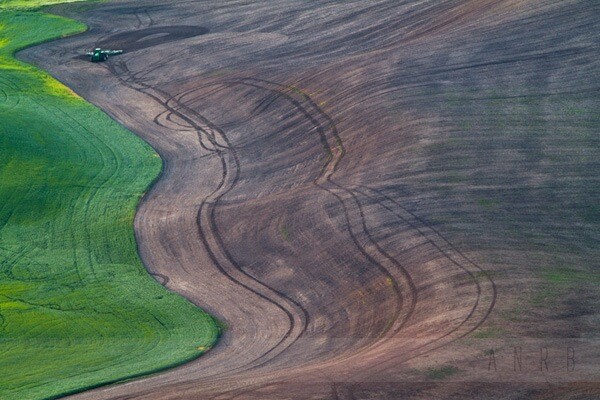
2. Use wide lens

Try to use wide lenses for landscape shots when you want to create an impact of size. You can use a wide range of lenses to shoot landscapes but the vistas are amazing if you shoot with the widest lens possible because they give you a bigger angle of view.
improve-photography-tips-2222.jpg

3. Sharpen Your Subjects

Keep your main subjects sharp. Sharp details in the image truly draw the viewers’ eyes towards the subject. Use your tripod in low light conditions to make sharp pictures. Try to make use of the new sharpening effect in Adobe Camera RAW. It does a great job and has improved from previous versions.
improve-photography-tips-3333.jpg

4. Keep it Clean

A background makes or breaks your shot so be sure to think carefully about the how you place your subject. Keep the background clean, simple and clutter free. Think about where the viewer should be focused….
improve-photography-tips-4444.jpg

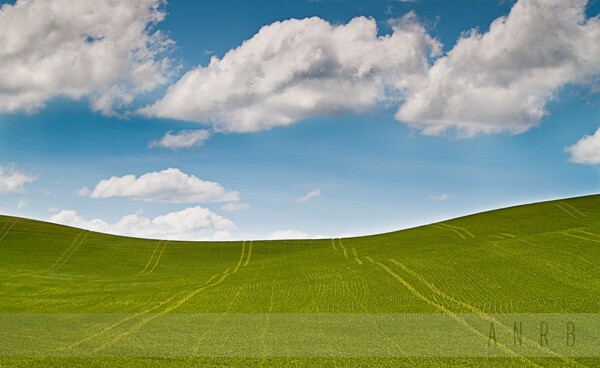
5. You Can’t Have Too Many Clouds

Use fluffy white clouds on a blue sky to produce dramatic skies. Is it overcast with too many clouds to see the sky? The sky is now a giant soft box. This is the time to shoot portraits or waterfalls and streams with a motion blur effect.
improve-photography-tips-555.jpg

6. Behind Every Great Shot is the Sun

Stand with the sun at your back and the light of the sun falling on your subject. Unless you are making artistic pictures always try to keep the sun behind you.
improve-photography-tips-6666.jpg

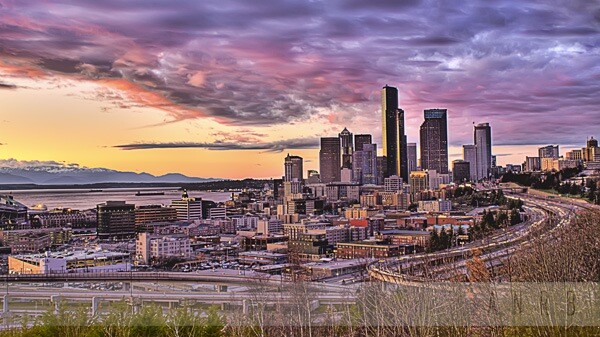
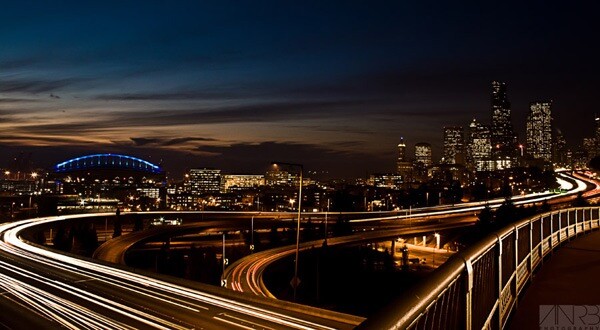
7. Light Trails

Enhance your dawn and night urban shots with light trails. Use vehicles or any other moving lights to add interest, mood, and drama. Light trails almost always makes the shot interesting (learn: how to shoot light trails).
improve-photography-tips-7777.jpg

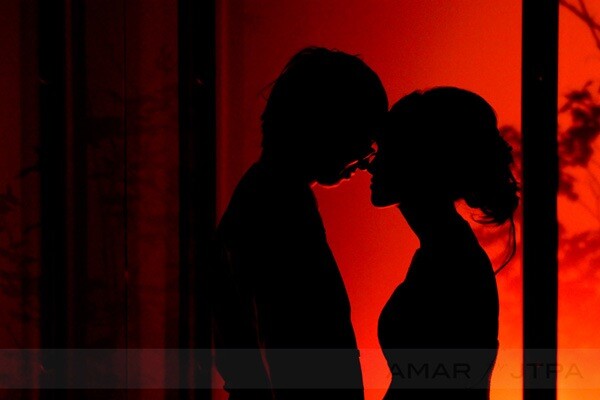
8. Silhouettes

The key is an uncluttered, lit background. Simply place your subject in the foreground so that you have clean, sharp lines and go for it. Play with placement and angles to make awesome silhouettes (learn: how to shoot Silhouettes).
improve-photography-tips-8888.jpg

9. Top to Bottom

Look straight up. Look straight down. Now examine everything in between. There are great shots from every vantage point, including an unexpected angle. Sometimes we focus so much on the obvious shot that we miss something special just a heartbeat away.
improve-photography-tips-9999.jpg

10. And finally… It’s a Camera not a Machine Gun


Unless you are taking action shots or a time lapse series, try to reduce the number of shots. Don’t just fire away hoping for something good to appear during editing. Think, move, and adjust your framing before you click the shutter. You’ll develop better instincts and save hours of time editing those hundreds of extra images.
improve-photography-tips-10101010.jpg

Reversing the Inverse Square Law

dps-intro.jpg
Admittedly, one of the most boring subjects in photography is the inverse square law. But before you begin scratching your head and yelling out “the inverse-what?” Just hold on a sec.


First off, one does not need to memorize the laws of light to go and start taking pictures, or even to become a professional. But anyone with an SLR that truly wants to master all the variables in an exposure, you should at least know about it, and have a good sense of how it works. And of course the main purpose to know about the inverse square law (if you haven’t figured it out already) is when making the dive into flash photography.
Therefore, if you’re one of those who claim “I don’t shoot with flash, I only use available light,” then have fun on your little pedestal making up excuses on why you pretend not to be interested in flash photography. Sure your brand new Canon 5Dmkii or Nikon D3 with a 50mm f/1.4 lens is going to destroy the darkness with stunning images at ISO 3200, but we are talking about professional studio portraiture / magazine quality photography that utilizes flash to create amazingly sharp, colorful, and beautifully lit photos. Not to mention, your flashes are “always available” — use them to your advantage.
Alright, now that we have that out of the way, let’s look at some basics that we might already know.

Shutter Speed, Aperture, and ISO sensitivity

Shutter Speed

By now everyone knows that the longer the shutter speed, the more light you let in. Inversely, the faster the shutter, you let in less light. And of course, stops of light (in terms of shutter speed) work in factors of two. That means if you double a shutter speed of 1/100, it becomes 1/50. That is ‘one stop of light’ brighter. Inversely, if you cut it in half from 1/100 → 1/200, you have made your exposure ‘one stop darker’.
Great, let’s move on.

Aperture

dps-1.jpg
dps-1-histogram.png
SB-900 @ 1/2 power – 3ft away

We should all have our f stops memorized. If not, it’s a simple scale where we can double our numbers, starting at f/1, and each time we double, we will increase by two stops of light. Therefore:
1 → 2 → 4 → 8 → 16 → 32
To calculate our increments in-between, we simply multiply each stop by our magic number 1.4 (which is, coincidentally, the rounded number of the square root of 2 (which is ~ 1.414)). This makes our first stop easy. 1 x 1.4 = 1.4! We can now fill in our gaps accordingly!
1.0 → 1.4 → 2.0 → 2.8 → 4 → 5.6 → 8 → 11 → 16 → 22 → 32
We now have an aperture scale displaying full one stop increments. Just for kicks, let’s have a brief look at what a classic third aperture scale looks like (since many of you will be working with these numbers on your SLR):
… → 1.4 → 1.6 → 1.8 → 2.0 → 2.2 → 2.5 → 2.8 → …

Ok, I get the aperture numbers, remind me of the exposure relationship?

Let’s say we had a correct exposure of 1/125 at f/8. Your model sitting their patiently is waiting for their beautiful portrait to be taken. You (the photographer) have made a design decision to go for a more shallow depth of field. So you drop your aperture to f/4. That’s two stops of light brighter. f/8 → f/5.6 → f/4. So to compensate, you speed up your shutter by two stops. 1/125 → 1/250 → 1/500. Easy peezy, makes sense, been there done that.

ISO Speed

dps-2.jpg
dps-2-histogram.png
SB-900 @ 1/32 power – 3ft away

We all know that our lowest ISO produces our cleanest files. Our light stops will look fairly similar and our scale usually looks something like this:
100 → 200 → 400 → 800 → 1600
Some of the latest cameras like the Nikon D700/D3, or the Canon 5Dmkii go up to crazy ISO’s like 25,600, which is four stops brighter than ISO 1600!
Jumping quickly back to our example, if we were originally at ISO 400 and needed to drop two stops of light, we could have simply went from ISO 400 → 200 → 100

Ok, now what about this flash thing?

Flashes have stops of light too! These increments are measured in half increments, just like shutter speed. This is what we call the “flash power,” or rather, how much light it spits out. Our scale looks like this:
1/1 → 1/2 → 1/4 → 1/8 → 1/16
From left to right, we say “full power,” “half power,” “quarter power,” etc. Some flashes can let out light as dim as 1/128 like the SB-800/900 or the Canon 580EXii.
One of the main things you should consider when buying a flash, is to look at how powerful they are. Meaning, “how bright will this be at full power compared to this other flash at full power?” We can tell how powerful they are by looking at the flash Guide Number. This number is extremely important to know when buying a flash. Almost nearly as important as knowing how many millimeters your lens is. For example, you wouldn’t go out and buy a 200mm lens without knowing it’s, well, 200mm! Right?

What is a Guide Number?

In simple mathematical terms, it is aperture multiplied by distance, in which your flash can properly expose a subject at a given distance (aperture and distance). The standard Guide Numbers you should be looking for are measured at ISO 100 (film speed), at the 35mm head position, at full 1/1 power.
Let’s take a basic Nikon flash, for example the SB-600 has a G.N. of 98. To make our math easier, let’s just round it off to 100. What this means is the following. Take a look at our ascii diagram. We have a flash (F), a subject (S). They are twenty feet apart in distance.
/
(F)——————————20′——————————(S)
\
To properly expose our subject, we would need an aperture of f/5.
f/5 × 20′ = 100 G.N.
Now if we moved our subject 20′ further…
/
(F)—————————————————————40′—————————————————————(S)
\
To compensate or this distance, we would need to let in more light! This means we’ll have to open up our aperture to f/2.5
f/2.5 × 40′ = 100 G.N.
If we kept our aperture at f/5, we would underexpose our subject. Likewise, if we opened up to much, for example, to f/1.4, we would overexpose our subject. Got it?

Ok, I’m ready for that inverse square thingy

Alright, if you insist: The inverse square law states that “the intensity of light radiating from a point source is inversely proportional to the square of the distance from the source.
Therefore an object twice as far away, receives only 1/4 the amount of light. Or if it’s twice as close, then it’s 4x as bright. Each of these is a difference of two stops.


This is confusing, I know. But luckily, and coincidentally, we already know a little about this already with our aperture scale. Just know that light has “depth” in the same way that our focal plane does. By now you know that the closer you get to an object, the shallower your depth of field looks, of which we can conclude that all objects behind your subject “quickly fall out of focus.” This same exact rule applies to light (Thank heavens!). Let’s look at a simple example, and we’ll use the numbers on our aperture scale to make it easy.
In this illustration, we added a background (B):
/
(F)——————————4′——————————(S)——————————4′——————————(B)
\
Let’s assume these settings:
ISO 100
f/4
flash is at 1/4 power
It is safe to assume that our background is two stops underexposed. (4′ → 5.6′ → 8′)
Now what if we moved our subject two feet closer toward the flash?
/
(F)————2′————(S)————————————————6′—————————————————(B)
\
Since we just moved our subject “twice as close” we made it two stops brighter! Therefore to make up for this overexposure, we need to do one of two things:
A) Dial down the flash two stops
1/4 → 1/8 → 1/16
or
B) Close down the aperture
f/4 → f/5.6 → f/8
Each will keep your subject properly exposed, but it’s an artistic decision for you to make if you want to keep your shallow depth of field (option A), or remove more ambient light and get a slightly sharper image (option B). Also pay close attention that due to the inverse square law, our background is now “four stops” underexposed!
8′ → 5.6′ → 4′ → 2.8′ → 2′

Cool! What flash do I buy? The one with the higher Guide Number, right?

Well, kind of, yes. There are some cases where newer, more expensive flashes will have lower Guide Numbers than say for instance, the 30 year old Vivitar 285HV for $89 (via B&H) that has a G.N. of 120 whereas we’ll see Canon selling their flagship 580EXii for over $400 which has the same G.N. Or even the new Nikon SB-900 has a G.N. of 111. What’s up with that? Well, clearly if you buy a new Nikon or Canon speedlight for your system, it will talk to your camera with all the latest and greatest i/e-TTL technology, the stops of light will range from full 1/1 power to 1/128, whereas the Vivitar only has stops of 1/1 → 1/2 → 1/4 → 1/16 (yes, it skips 1/8). The SB-900 will have a 17-200mm range of light to cover larger or tighter spaces. It has gel detection, three different patterns to throw at your subjects, it even has super quick recycling time.
But hey, don’t knock on the Vivitar; off camera, that’s a helluva bargain for that much power! Hook it up to your camera with a PC chord, or a pair of Pocket Wizards, and you’re golden.
With all that’s been said, go out, get a flash (if you don’t already have one), throw it on manual, and experiment by taking a ton of pictures.
This article has been republished for use at Digital Photography School.
About the Author: Dustin Diaz is an Engineer at Twitter Inc. and a professional photographer with his wife Erin Caton. Together they run Flash Bullet Photography in San Francisco.

A Guest Post by Dustin Diaz from Flash Bullet Photography

How to Capture Beautiful Indoor Portraits Without Flash

_dps_ambient-techniques_005.jpg

Note: this post contains one image with very mild nudity.


For me, using flash can be the most efficient way to create a high-quality portrait. There’s nothing like it for an editorial shoot when you need that combination of full lighting control, minimal shooting time, and predictable results. Sure, you have to know what you’re doing to make it come together like that. But that ability comes with knowledge and experience. Mastering flash, means mastering your light in any situation. Sometimes, however, there is beautiful light to be found, just waiting there for you to use it. Natural and constant ambient light can be your best friends if you have a little time and flexibility with the environment and your subject.
Constant light, as opposed to flash/strobe lighting, will allow you to see and adjust its effect on your subject and the environment in real-time. This is a great way to learn about lighting placement and this knowledge and experience will certainly carry over into your flash portraiture. As I like to say, "light is light," meaning the principles of lighting a subject and their environment are essentially the same whether the light source is a quick "flash" or a constant illumination. The main difference is that the flash is capable of producing a more intense light but with too short of a duration for the photographer to see the effects of its position on the subject in real-time. With constant lighting, you can casually move the lights and your subject around and know instantly how the changes will affect the portrait you’re making. With a few test shots to check exposure, you’re good to go.

Lighting Setups

Natural Light. Window light as just about the most beautiful light you can find when the conditions are right. It can serve as a huge softbox and be manipulated with any combination of window dressings such as blinds and curtains. Simply place your subject nearby the window and let the light create much of the portrait’s drama. I like to position the subject so that there is plenty of shadow to one side, providing many options for classic portraiture looks.
_dps_ambient-techniques_001.jpg
Window light narrowed with curtains. ISO 800, 50mm, f/2.8, 1/80 sec.
Household Lights. You can also make great use of simple household lamps. I like to remove the shades off the room lights and utilize them as bare bulb light sources. To start off, just position the main light in front and to one side of your subject, preferably several inches higher than her head. This will give you a classic lighting pattern to work with. A second light may be placed farther back from the subject and serve as a back light or kicker which will add dimension.


_dps_ambient-techniques_002.jpg
Setup consisting of two household lamps, minus the lamp shades. Kicker is behind Kelly and main lamp is almost directly in front of her, just to camera right. ISO 800, 50mm, f/2.8, 1/60 sec.

Camera Settings

My general advice for any indoor shooting is to think "fast and wide." Your initial camera settings should be a balance of the highest ISO possible that will still provide acceptable noise levels for your purposes, the widest aperture your lens will allow, and the fastest workable shutter speed. Of course, each of these controls are interrelated and integral to overall exposure, so you’ll have to make some adjustments, and concessions, for the environment you’re working in and the effect you’re trying to achieve in your shots.
Fortunately, most DSLRs are now capable of low noise even when using high ISO speeds, so most room lighting and even low natural light won’t be a problem for you. But even if your camera happens to produce lots of noise at higher ISOs, that isn’t necessarily a big concern. Either leave the noise as is, or bring some of it down in post-processing using your choice of available noise reduction techniques. Many photographers are actually artificially adding noise BACK into their images in order to reproduce the look of film, or otherwise reduce the super-clean, slick, digital look coming out of the camera. Simple advice: Don’t worry about the noise unless it gets in the way of the image you’re trying to create.
Another thing that will really help with achieving beautiful portraits in lower lighting situations is a fast lens. By "fast" we’re referring to a lens with a wide aperture of at least f/2.8. The wider the aperture, the more light the lens allows to pass through in a given unit of time. This will give you more freedom with your ISO settings (as they won’t have to be so high to compensate for less light coming in through the lens), and faster shutter speeds (as they won’t have to be so low to compensate for less light coming in through the lens). Lenses with wider apertures also have the capability of shallow depth-of-field, which can greatly add to the interest and mystique of your portraiture.
Shutter speed is an important consideration not just because of its effect on overall exposure, but also because of potential blur with lower speeds. As with ISO however, the effect of supposedly less-than-optimal shutter speeds is what you make it. You might find an occasional blurry image makes a rather artistic statement. Every portrait doesn’t have to be sharp as a tack.
_dps_ambient-techniques_003.jpg
Another household light bulb setup, featuring Chris. Bare household light bulb off to camera left illuminating her on one side and the background at the same time. Main light is coming in from camera right. ISO 800, 85mm, f/1.8, 1/60 sec.
So, with those factors in mind, you might want to try the following exposure combination as a starting point and adjust according to your needs:
  • Camera Mode: Aperture Priority
  • Aperture: f/2.8 (or the widest possible for your lens)
  • ISO: 800
  • Shutter Speed (target): 1/100 sec. or higher.
In Aperture Priority mode, your camera will automatically set the shutter speed for you while you control everything else. You’ll have to pay attention to your shutter speed to make sure it isn’t falling so low as to create unwanted blurring. Again, these are just starting points. With a stationary pose and a steady hand, I’ve managed hand-held shutter speeds as low as 1/15 sec. to produce good results. You might also want to try your camera’s Manual mode to maintain full control of your settings. If your lighting conditions are going to be fairly static, I’d recommend it.
Also, you will most likely benefit from shooting in your camera’s RAW (NEF) format so critical adjustments, like white balance, exposure, and contrast can be made easily and with minimal loss of information in post-processing. Although white balance settings aren’t actually imposed on the RAW file, you can set WB as you wish during shooting in order to get an idea of what the final image might look like. Plus, a chosen WB setting will tell your RAW conversion/processing software what color temperature and tint settings to best start off with for each image.
_dps_ambient-techniques_004.jpg
Window light illuminates Satu. ISO 800, 50mm, f/4, 1/200 sec.

Post-Processing

Aside from the creative post-processing possible with your ambient light images, there are some things you might want to address in initial post:
White Balance: Not all light sources produce the same color temperatures. Despite what they look like to our eyes, the camera will record various types of household lighting (florescent, tungsten, daylight balanced) and natural light (sunset, cloudy, shade) as producing different color casts. So, if you are shooting a portrait using a bright tungsten light as your subject’s main light, but you have a strong window light coming through in the background, you might have an undesirable color mix to deal with.
Fortunately, you can correct these types of color mismatches in post-processing by making a general white balance setting choice in your software, and selectively altering the offending colors in specific parts of the image. If this isn’t something you’d like to worry about, then don’t. The colors might be acceptable just the way they are. If not, you always have artistic color altering effects and even black and white conversion options. So, it’s all good.
Noise Issues: I personally like a little noise in my images most of the time. But if you had to use very high ISO settings to get your shots, and have the need to bring some of the noise down, there are a number of good built-in, stand-alone, and plug-in software options to handle this. I will occasionally use the noise reduction tools in Lightroom or my Noise Ninja plug-in in Photoshop, for example.
Natural and ambient light photography indoors can be a great way to learn the finer points of lighting your portraits. The actual experience for you and your subject is also worlds apart from the strobe and studio effect of working with flash. Unlike outdoor shooting, indoor work without flash can introduce problems having to do with lower lighting situations. Using some to of the advice above, you should be able to handle the challenges of low-light portraiture and come away with great-looking images.

How to set your digital camera up for shooting HDR images

HDRsample.jpg


Introduction


You’ve probably heard of High Dynamic Range (HDR) Photography, it’s made quite an entrance into the world of digital photography.
If you haven’t, the HDR process is accomplished by taking multiple exposures of a high contrast scene (usually a landscape or cityscape), at different levels of brightness, and then combining the best light from each exposure into one image.
The end result is a stunning image that very closely resembles how the human eye views a scene. This process of digital manipulation has caused a bit of controversy and debate in the world of photography, especially with images that are “over-cooked.” One thing is for sure though, HDR is here to stay. When done right, this unique and in depth processing technique can produce beautiful works of art that mimic the way we view and remember a landscape or scene.
The above image is an example of what HDR processing can produce. This image, taken from the Big Island of Hawaii, would not be possible without HDR processing. It was taken around noon, the harshest light of the day. The first image is the best image my camera could produce given the situation. While still beautiful, there are obvious problems. Get ready, this article is going to show you how to take your digital camera and turn it into an HDR shooting machine!

Step 1: Locate Your Camera Manual

I know, we all hate manuals. But if you want to become the best photographer you can be, you need to become best friends with your cameras manual. Spend time with it, take it with you on trips, read it in the airplane, memorize every setting on your camera so you know it inside and out, make your significant other jealous of it. And for this lesson, have it handy as a decoder in case you have a different camera model. If you don’t have your manual, simply do a Google search for: (your camera model) manual. You should be able to easily find a pdf version to download.

Step 2: Discover Auto Exposure Bracketing

1DS_1999.jpg
Auto Exposure Bracketing (AEB) is the main component in creating an HDR image. Bracketing is the term used to describe taking multiple exposures of a scene, the key element to capturing all of that wonderful light in a scene.
Why is this necessary? Well, take for example your typical post card from Hawaii, with a silhouetted palm tree hanging in from the side of the frame, and a beautiful sunrise as a backdrop. While beautiful, the silhouette is actually caused by the failure of the camera to produce the full dynamic range of light in that scene. The sunrise is simply too bright and there is too much of a contrast between the sky and tree. Therefore, the tree is reduced to pure black.
Your cameras AEB setting will take an exposure for the sky in the background, an average exposure of the entire scene, and finally an exposure for the palm tree in the foreground. Or in technical terms, a bracketed sequence of exposures listed like this: -2, 0, +2. This sequence simply means one exposure that is two stops of light underexposed, a proper exposure according to the cameras light meter, and one exposure that is two stops over exposed. Depending on your camera model, you may only be able to do 3 exposures in AEB at the most. Others will allow 5, 7, 9 and up. The more exposures you can get, the better, because the potential for capturing all the light in the scene increases. A bracketed sequence of 7 exposures would look like this: -3,-2,-1,0,+1,+2,+3.
Go into your cameras menu settings and find the option for AEB. On a Canon 5D Mark II for example, AEB is located under the second menu screen, and is labeled “Expo.comp./AEB.” To change from one exposure to three, highlight the menu setting, click the SET button, then turn the dial on top of the camera to the right.

Step 3: Set Your Camera to Av Mode and Determine an Aperture

1DS_1997.jpg
Aperture Value (Av) Mode is really the only setting that will work for HDR shooting. This setting lets you determine the aperture of the exposure, and the camera determines the shutter speed. When shooting multiple exposures, you have to consider what needs to stay the same during the brackets.
If you set the camera to Time Value, the camera will make sure the shutter speed stays the same through all the exposures. Therefore, in order to create dark to light images, the camera will adjust the aperture, and that is no bueno. The aperture controls depth of field, or how much of your scene will be in focus. If that value is different in every frame, combining them later just won’t work.
While using the Manual setting will work, using the Av setting is the easiest and most convenient setting to start with. If you already fully understand shooting in Manual, by all means go for it. But make sure that you never change your aperture during your bracketed exposures! If you don’t fully understand Manual mode, start with Av and work your way up to it. Av mode simply saves time over having to dial in the exposures manually, and saving time is always a plus.
Once you are in Av mode, it’s now time to determine what aperture you want to shoot at. Again, aperture controls depth of field. So for a landscape, you will most likely want the entire image to be in focus, with no blur in the background. When determining your aperture, remember this: The higher the aperture, the greater the depth of field. Want to know a little trick you can use to determine aperture (although it isn’t 100% accurate)? Imagine you have 20 people in a line, and the line is going away from your camera.
The people are staggered so that you can see each of them, but each person is further and further away. If you want just the first person in the line to be in focus and all the rest to be blury, set your aperture to 1. If you want the first 10 people in focus, set your aperture to 10. If you want all 20 people in focus, set your aperture to 20. Pretty simple concept right? With that said, just about any aperture value above 11 will have your entire frame in focus (most of the time). Start at f/11, and experiment your way up and down from there.

Step 4: Determine Your Metering Mode

metering.jpg
Metering is one of the more complicated settings on your camera, and one that I get a lot of questions on from new photographers. In a nutshell, your metering mode is simply how your camera samples light to determine the proper exposure for the image. The camera has to see the scene before it, analyze the light in the scene, and determine what your camera settings should be.
If you are new to photography, you should know that in most cases, Evaluative Metering will work just fine. But don’t take that bit of knowledge and forget about metering. There is also partial, spot, and center weighted metering. Each of which have their time and place where using them will drastically improve your image. Make sure you take the time to understand each setting, but for now, set your metering to Evaluative.

Step 5: Set your white balance

wb.jpg
Again, this is a topic that confuses some people. It’s also a topic that some photographers get lazy with. White balance is incredibly important to your images color balance. If your white balance is off, your entire image will be off. Auto White Balance (just like Evaluative Metering) will work most of the time. Cameras are smarter and smarter these days, and the automatic settings work more often than not. But just like the metering modes, you need to know the different white balance settings.


If your camera fails to capture the colors in the scene like you see them, it’s time to change the setting. The quickest and easiest way to correct white balance is using Custom White Balance. Simply find something in the scene that is pure white (a white wall, a piece of paper, a white shirt, etc) and take a close up picture of it so that the color white completely fills the frame.
On a Canon 5D Mark II, go to your menu, scroll to the second list of settings, select Custom WB, and follow the prompts to select the last image taken on the card. Your camera will then take that image and use it to create a color balance where that image is pure white. Your next picture of that object should look as white as snow. Remember, white is your foundation in color balance. Get white set, and the other colors will fall into place.

Step 6: Determine your ISO Setting

iso.jpg
Your ISO setting is simply your cameras sensitivity to light. The higher the number, the more sensitive it becomes. The best way I know to figure out ISO is to imagine them as worker bees. Therefore, at ISO 100, you have 100 worker bees that go out and gather light for you when you take a picture. At a shutter speed of 1/100th of a second, you have 100 worker bees to go gather as much light as possible in 1/100th of a second.
So what if those little bees can’t get enough light in that amount of time? Just send more bees! At ISO 200 you will have twice as many bees to gather light for you, at ISO 400 the number doubles again, and so on.
The downside to ISO is that the higher the number, the lower the quality of your image. High ISO values produce what’s called noise, and unfortunately, the process of combining exposures in HDR will already bring in lots of it. Because of this problem, you need to set your ISO as low as possible. ISO 100 is usually your best bet, unless you absolutely can’t take all your brackets at this number. Some cameras will even go down to ISO 50, but there is debate as to whether or not this makes the image less sharp.

Step 7: Get a Tripod!

With a high aperture and a low ISO setting, your shutter speeds are going to become slower and slower. This is going to make it very hard to hand hold your camera. When shooting with HDR in mind, you want there to be as little movement as possible during the multiple exposures. Anything you can do to eliminate the possibility of movement is worth it.
Switching from hand held to a tripod is a sure fire way to keep your camera still during multiple exposures. The type of tripod you need will simply depend on you and your shooting style. If you don’t do a lot of traveling, and simply drive to a location and set up, you may want to invest in a strong, heavy, aluminum set of tripod legs. If you love to travel, hike, and really get out there, you will need something that isn’t going to bog you down on your journey.
For those people, I would suggest a smaller, more compact set of carbon fiber tripod legs, or even a light weight version of aluminum legs. Your tripod head is just as important. You need something that will support the weight of your camera easily. Ball heads are all the rage right now, and for good reason. They allow smooth, easy movements of your camera, without the use of long rods that stick out everywhere.

Step 8: Use Your Cameras Self-Timer

timer.jpg
Another way to take movement out of the equation is to use a self timer. This gets rid of the possible movement from holding down the shutter with your finger. On most cameras, there is a setting where you can start a timer when the shutter release is pressed. If you don’t have this setting, you will need to purchase a shutter release cord.
My preference is to use the 2 second timer in camera, not having to use a shutter release cord is just one less thing to carry around, and the 10 second option just takes too long. With the self timer setting, you simply press the shutter release down and then step away from the camera. Two seconds later, your camera fires off all 3, 5, 7, or 9 exposures in sequence. Hearing the sound of all these exposures may cause a sudden feeling of satisfaction and anticipation to come over you, but don’t be alarmed.

Step 9: Choose the right lens for the shot

HDR photography can be used for any image with a high level of contrast, but most often it is used for landscapes and cityscapes. These subjects are often large and overwhelming, and having the right equipment can make all the difference in the world. For most situations, the best option is going to be a wide angle lens.
That is, any lens that can zoom out to about 28mm or wider. The 24-70mm lens is my absolute favorite lens for shooting landscapes, and I highly recommend it. Anything under the 28mm range is going to start getting pretty wide, so get a lens that you can afford that falls into this category. Now, one of the downsides to using wide angle lenses is distortion, but that is for another article!

Step 10: Switch to Manual Focus

Now that you have your lens ready to go, it’s time to get used to the world of manual focus. Auto focus is an amazing bit of technology, but it isn’t so great for landscapes. If you really want to get everything in your frame in focus, you have to go manual. Auto focus will pick a certain spot in the frame, usually the center, and make sure it is as sharp as possible. With manual focus, you will want to set your focus point to infinity (the little sideways figure 8 on your lens) and forget about it. The infinity setting will average out the entire frame and bring it all into focus.
This isn’t always the best thing to do though. Sometimes there is a subject that has supreme importance over the rest of the frame, but I would still suggest manual focus. When this is the case, switch your camera over to the live view setting if you have it. This is where the screen on the back reflects what you would normally see by looking through the view finder. With this selected, you should be able to zoom in on your subject. After zooming in on the screen (not with the lens), you can begin to turn the focus knob on your lens, getting the focus to that perfect sweet spot. This will ensure that your subject is tack sharp, but don’t be surprised if other parts are slightly softer.

Step 11: Purchase a Bubble Level

Having a level frame is so important! If you simply go out and eyeball your frame for straightness, you will almost always be off. That means that in post, you will have to straighten the image, losing sometimes valuable and crucial pixels in the process. Purchasing a cube level for your cameras hot shoe is the easiest, and cheapest way to ensure straight images. Try and get used to the mindset of getting as much done in camera as possible. Don’t rely on post processing to correct laziness in the field.

Conclusion:

There you go! Your camera should be all ready to go. Now get out there and shoot some brackets! In the next installment of this three part series, we will go over a step by step guide for shooting in the field.
Composition, what to look for in your images, the wonderful world of histograms and more. In closing, here is a large version of the image you saw at the beginning. If you’d like to see it full size, click the image to be redirected to flickr. There you can click full size and scroll around in it. Happy shooting!
boilingPots.jpg
Stay tuned for two more posts in this series – ‘Beginners Guide to HDR Photography’. The next post will be on shooting in the field and getting the images back to the computer. The final post will cover post processing techniques.